Advanced Installation
-
Run the User Workspace Manager Installer by executing setup.exe from the installation media.
-
In the drop-down language selector box click the language required.
The selection made here will determine the language for all User Workspace Manager components downloaded.
Note that when installing the product console, users retain the ability to select the language required.The Welcome screen displays.
-
Click Next.
The License Agreement screen displays.
-
Read the company End User License Agreement. If you agree to the terms, select I accept the terms in the License Agreement and click Next.
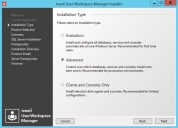
The Installation Type screen displays.
-
Select Advanced and click Next.
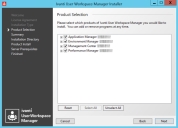
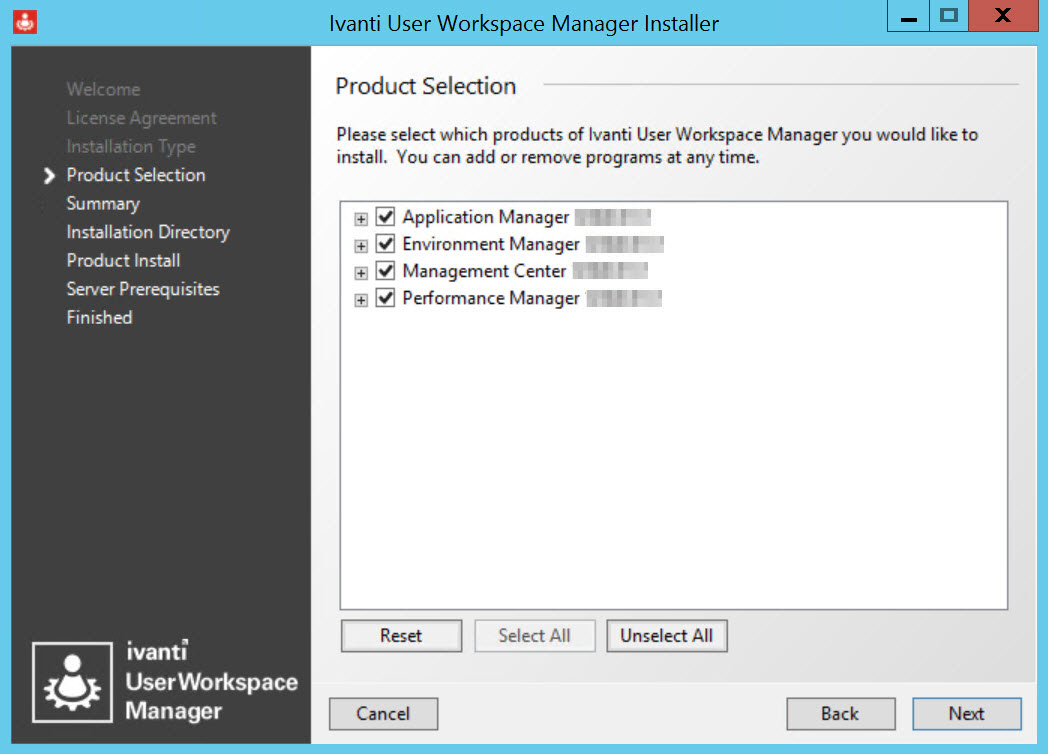
The Product Selection screen displays.
-
Expand the Products to see all the product components that can be selected for installation.
The Server components do not display if the Operating System is not compatible. Only the Product Consoles can be selected for install.
-
Select all the product components that you want to install.
If you want to install multiple instances of the Personalization Server or Management Server:
-
Select Add new Personalization/Management Server instance.
The Add New Instance dialog displays.
- Enter the name of the additional instance.
-
Click OK. All instance names must be unique.
The server instance now displays in the list of components for selection. You can add up to 16 instances.
If you select Back on the Installer a message displays Remove Pending Instance [instance name]?. Click OK to continue going back and to remove the instance or click Cancel to remain on the Product Selection screen and keep the instance.
For multi-instance environments, further configuration is required, see Extra Configuration for Multi-instance Personalization Servers.
-
-
Click Next to display the Summary screen.
-
A summary of the products selected to install displays. Click Next.
The SQL Server Installation screen displays.
-
Select whether you want to install a local SQL instance. The default selection is No.
If you select Yes, the Microsoft Software License Terms display. Read the terms and if you accept them, select I accept the terms in the License Agreement.
Alternatively, to use a remote SQL instance, accept default selection No and click Next.
If there are any prerequisites missing, the Prerequisites screen displays.
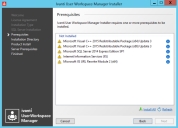
- The Prerequisites screen lists the prerequisites that are not currently installed. Select Install All to automatically install all missing prerequisites.
-
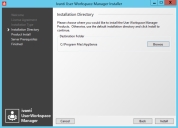
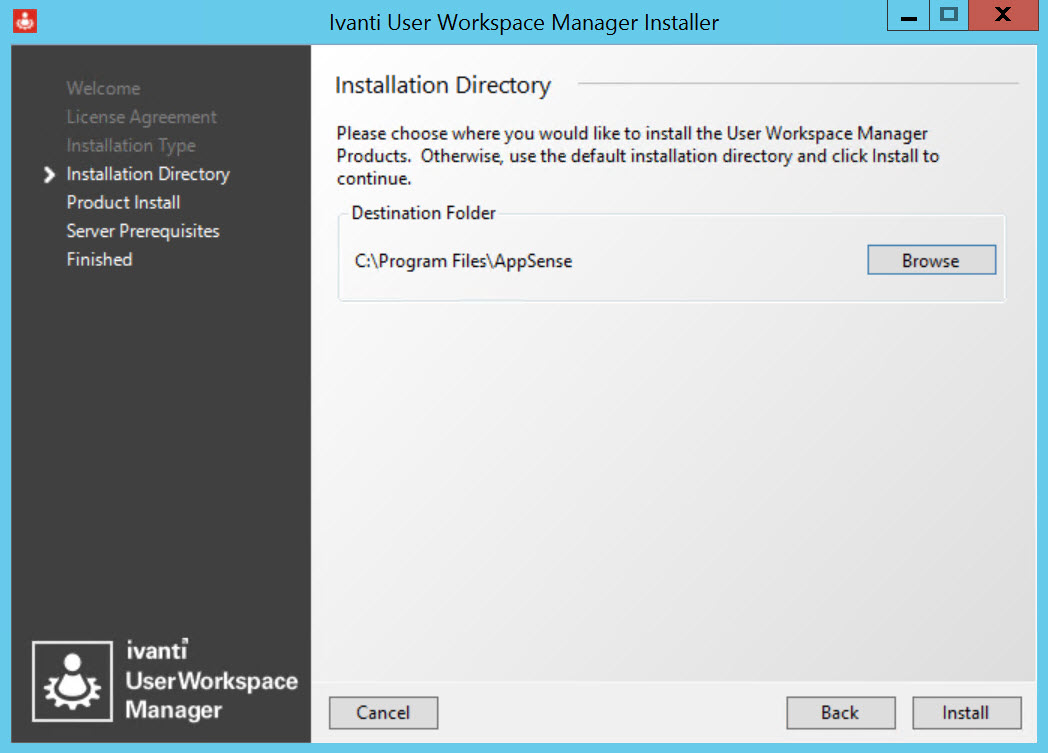
Once all of the components are successfully installed, the Installation Directory screen displays.
-
The default installation directory is C:\Program Files\AppSense. To continue the installation to the default location click Install. Alternatively, Browse to select a new installation location. Once you have selected the installation, click Install.
The Product Install screen displays the progress of the installation.
-
If there are missing server prerequisites the Server Prerequisites screen displays. Click Install All to install all the components listed.
-
Once all product components have been installed, the Install Complete screen displays.

-
Click on the server hyperlink; http://<SERVER>:7750, to display the Server Configuration Portal in a web browser.
Use the portal to configure the Management and Personalization servers, server instances and databases.
-
Click Finish to exit the Installer and open the Product Documentation.
If you want to exit without opening the Product Documentation, deselect Open Help Portal on finish and click Finish.


Once installation is complete a Server Configuration Portal shortcut is added to the desktop.
For more information, see Server Configuration Portal.
Extra Configuration for Multi-instance Personalization Servers
When a named instance of the Personalization Server is installed, server self-registration is disabled for non-default instances. The new server must be manually added to the appropriate site using the Sites node in the Environment Manager Console.
For further information, see the Environment Manager Help.